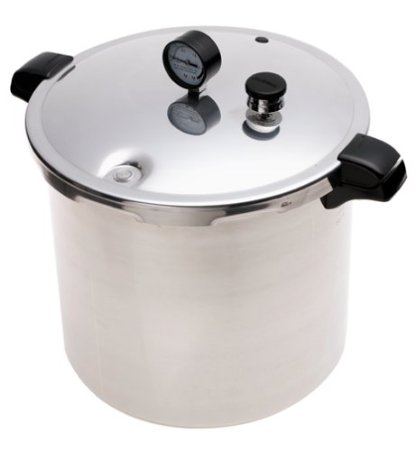
It’s been a busy time at our house lately. The garden is ripe with harvest, which means, of course, that we need to deal with all those fruits and vegetables. Time to bring out the canning equipment and save that harvest! New to canning? Check out this home canning equipment guide.
Of course, I’m always happy to see all those jars of homegrown vegetables on my shelf, just waiting for us to enjoy them through the winter. That’s why I love, love, LOVE my canner. It was a gift from my husband last year. I know they say not to buy women appliances for their birthdays, but my other favorite gift was a Kitchen Aid stand mixer (which I use ALL the time), so I guess I just don’t fit the mold!
My canner is a combination water bath, pressure canner. We chose this model because I wanted to process things like pickles and peaches, which do best with the water-bath method of canning. But I also wanted to can green beans and tomatoes, and while you can process them with the water-bath method, it takes a LONG time. This canner also comes in a smaller size, too, which is great if you, too, have lots of awesome kitchen appliances and storage space is an issue.
Whichever canner you choose—or if you were lucky enough to inherit one from a family member or friend who doesn’t can anymore—always take time at the beginning of the season to make sure all the equipment is in good working order.
Always check to make sure the rubber seal that sits inside the lid isn’t cracked. If you have a pressure canner, you can even take the pressure gauge to your local 4-H extension office. They will check it to make sure the pressure is reading at the right gauge.
When my husband bought me my canner, he also included this great canning accessory kit. Of course, you don’t absolutely need any of these items to can successfully, but they sure come in handy. My kit included a funnel, a combination bubble remover and magnetic lid lifter, kitchen tongs, jar lifter and timer.
Again, if you’re lucky enough to inherit these from friends or family, just make sure the jars are clean and the metal bands are free of rust. If you’re new to canning and need to buy the jars, check out thrift stores first, but if you can’t find any, you can buy them at most supermarkets or on Amazon. (And with Amazon Prime, you can get them with free shipping, always a plus!)
Lids
Once you have all the other equipment in place, you just need fresh lids. If you’re buying the canning jars, they’ll come with lids. If not, you’ll need to buy new lids, since the lids won’t seal more than once. That’s why you should always throw away the lids when you open each jar of yummy garden goodness throughout the year.
You should also take a minute to make sure the metal bands are rust-free. If they have rust on the inside, you can try to clean them. Otherwise, just throw them away and buy new. It’s better to make sure you have all the right equipment in place than to spend all that time preparing and canning your harvest, just to find out the jars didn’t seal because you weren’t prepared!
Electric Kettle
This is another piece of my canning equipment that I consider essential. It makes the job go much faster, keeping boiling water at the ready when I need to top off the water in the canner, add boiling water to the green beans or tomatoes, or prepare my jars for the canning process.
While there are many great recipes for canning on blogs these days, you can’t beat the Ball Complete Book of Home Preserving. It’s chock full of helpful hints and canning guides to help make your first canning experience–or your 101st experience–a success.
Now that all your equipment is in place and you have your recipes and helpful hints in hand, you’re ready to can. Good luck!
Note: This post contains affiliate links. For more information, please feel free to check out my disclosure policy. And thanks for stopping by!


Do you can on a glass top stove? I’d like to get an electic burner to can on so I don’t have to. Any suggestions on which to purchase?
Hi, Chris. Yes, the only canning I’ve ever done was on a glass top stove. It works, but there are a few disadvantages. 1) You can scratch the glass if you’re not careful, and 2) it takes a long time for the pressure to go down because the glass top really holds the heat. If I had my choice, I would go with a gas range. Much easier to control the temp and processing time. As for brands of electric burner stoves, I’m not sure but would recommend checking out Consumer Reports before you buy! If you find something you like, be sure to tell us. I’m confident you’re not the only one in that situation. Thanks!